What follows is my attempt to replace PHP with Javascript in WordPress development.
In this post, I’ll discuss in detail how the GraphQL schema works in conjunction with WordPress. I’ll be using Sequelize to connect to the WordPress database, so we won’t have to write any MYSQL queries.
It’s going to be a long-ish post, so grab a Fresca, and let’s get to it.
Using Sequelize To Define a Connection and Models
Sequelize is pretty great. From their website, “Sequelize is a promise-based ORM for Node.js and io.js. It supports the dialects PostgreSQL, MySQL, MariaDB, SQLite and MSSQL and features solid transaction support, relations, read replication and more.”
Basically, we’re going to provide it some database connection details; we’ll then use that connection object to define models and export a query object that has a bunch of functions that will feed a GraphQL schema.
The Connection
import Sequelize from ‘sequelize’;
import devSettings from ‘../settings/dev.json’;
import prodSettings from ‘../settings/prod.json’;
const env = process.env.NODE_ENV;
const settings = env === ‘dev’ ? devSettings : prodSettings;
const privateSettings = settings.private;
export const publicSettings = settings.public;
const Conn = new Sequelize(
  privateSettings.database.name,
  privateSettings.database.username,
  privateSettings.database.password,
  {
    dialect: ‘mysql’,
    host: privateSettings.database.host,
    define: {
      timestamps: false,
      freezeTableName: true,
    }
  }
);
We import our production and development settings, then, using the Node Environment variable, determine which one to use. This is important because you will probably have a development database and a production database. Notice we export the public settings to the client and private settings remain hidden. We’ll use the public settings for other things, later.
Then, we define a connection using the determine settings. This is pretty straight forward. We can now define models based off of this connection. Lets look at the Post model as compared to what it looks like in the SQL database.
The Post Model
const Post = Conn.define(privateSettings.wp_prefix + ‘posts’, {
 id: { type: Sequelize.INTEGER, primaryKey: true},
 post_author: { type: Sequelize.INTEGER },
 post_title: { type: Sequelize.STRING },
 post_content: { type: Sequelize.STRING },
 post_excerpt: { type: Sequelize.STRING },
 post_status:{ type: Sequelize.STRING },
 post_type:{ type: Sequelize.STRING },
 post_name:{ type: Sequelize.STRING},
 post_parent: { type: Sequelize.INTEGER},
 menu_order: { type: Sequelize.INTEGER}
});
Here I’m defining a Post model using object keys that map directly to the posts table in the WordPress database. Notice that I’m using the wp_prefix from private settings. By default, WordPress uses a “wp_” prefix, but you can change this and people often do for security reasons. For my setup I’m using the default extension, so this translates to “wp_posts”.
Each key must have a Sequelize type—for WordPress these will always either be Strings or Integers. Notice that for the “id” key, we also set it to be the primary key. This is important for building relationships when querying (which I’ll get into shortly).
You don’t need to include EVERY column in the SQL table you are defining your model from. Indeed, a lot of the columns we don’t really need on the front-end.
Side Note: If you don’t have any SQL management software, check out Sequel Pro. It’s free, and it helps alot when building out models and schemas.
Defining Relationships
Here is the definition of the Postmeta model. A Post hasmany Postmeta, and Postmeta belongsTo a Post. First, let’s define a Postmeta model. Then, let’s define the relationsip. Sequelize makes this VERY easy.
const Postmeta = Conn.define(privateSettings.wp_prefix + ‘postmeta’, {
 meta_id: { type: Sequelize.INTEGER, primaryKey: true, field: ‘meta_id’ },
 post_id: { type: Sequelize.INTEGER },
 meta_key: { type: Sequelize.STRING },
 meta_value: { type: Sequelize.INTEGER },
});

Post.hasMany(Postmeta, {foreignKey: ‘post_id’});
Postmeta.belongsTo(Post, {foreignKey: ‘post_id’});
As you can see, the Postmeta model has a post_id field, which is the primary key for the Post model. We can relate these two by defining ahasMany/belongsTo relationship. Now, we can performa query for a Post and include all of its Postmeta.
Defining The Database Queries
So, not that we have a basic Post model setup, we’ll need some functions that a GraphQL query can resolve. These functions are also defined in the db.js file, and are comprised of Sequelize queries. Lets take a look at the basic getPostByName function.
const ConnQueries = {
 getPostByName(name){
   return Post.findOne({
     where: {
       post_status: ‘publish’,
       post_name: name
     }
   })
 }
}

export { Conn, ConnQueries };
getPostByName accepts the name of a post (aka its slug) and finds one that is published. This will return a Promise to our GraphQL query, which is great because GraphQL knows how to handle promises. Notice, we are just finding one. Lets create a query that finds all posts by post type.
getPosts(args){
 const {post_type} = args;
 return Post.findAll({
   where: {
     post_type: post_type,
     post_status: ‘publish’,
   }
 })
}
The only difference here is that we are using findAll, which will still return a promise, but it returns an array of promises. This is a bit more difficult to handle, but luckily graphql-relay helps. So, we’ve defined a Post and Postmeta?—?now, let’s look at the GraphQL side of things. Without GraphQL/Relay, we don’t have an easy way of querying this stuff from the client side.
Defining the GraphQL Schema
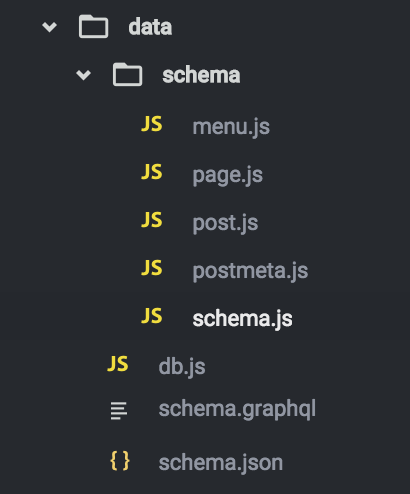
This is what the data directory for this project looks like. Db.js contains everything needed for our Sequelize connection as discussed above.
schema.js is our main schema that will import schema definitions from page.js, post.js, and postmeta.js. This file contains our actual schema androot query.
schema.graphql and schema.jsonare automatically generated for us by running an npm script that I will discuss later. For now, don’t worry about them.
Defining the Schema
We’re going to take a bottoms up approach here. In order to define the schema, we need to define the root query, which contains other fields that need to be defined. But it’s the most simple approach.
Here’s the schema definition:
const Schema = new GraphQLSchema({
 query: GraphQLRoot
});
Simple, right? Yup. GraphQLSchema is provided to us by the graphqlpackage. GraphQLRoot is a custom defined GraphQLObjectType as defined below.
Defining the Root Query
The root query looks like this:
const GraphQLRoot = new GraphQLObjectType({
 name: ‘Root’,
 fields: {
   viewer: {
     type: GraphQLUser,
     resolve: () => {
       return ConnQueries.getViewer();
     }
   }
 }
});
The root query is pretty simple. It only has one field and doesn’t take any arguments. The “viewer” field is a custom type, called GraphQLUser (which I’ll define for you below), and is resolved by calling the getViewer() method of ConnQueries (which is exported from the db.js file, as discussed above). In this case, getViewer() returns a User object that is defined in our db.js file. Its a simple object that has an ID of 1 and Name of “Anonymous”.
It was confusing to me, at first, that it was necessary to have a User at all. We’re not using this to modify any data, just consume it, and people consuming our data are (most likely) not going to be logged in to anything. The reason for defining a viewer field with a dummy User is because, currently, root level node connections to GraphQL are not possible. Refer to this GitHub issue for more details. For now, just know that its necessary.
Defining the User Object
The User object contains all of the fields we will need to make queries. Here is a simplified version.
const GraphQLUser = new GraphQLObjectType({
 name: “User”,
 fields: {
   id: {type: new GraphQLNonNull(GraphQLID)},
   posts: {
     type: PostsConnection,
     args: {
       post_type: {
         type: GraphQLString,
         defaultValue: ‘post’
       },
       …connectionArgs
     },
     resolve(root, args) {
       return connectionFromPromisedArray( ConnQueries.getPosts( args ), args );
   }
 }
})
Lets break this down. First, we give GraphQLUser a defining name (“User”). Next, we give User an id which is passed from the viewer object. Since the viewer is of type GraphQLUser, and is resolved by getting the User object definied in db.js, it will look for the “id” key ( in this case, the value will be 1).
Next, we define a field called posts that is of type PostsConnection which we will define ourselves. Connections are useful for pagination. You can (and should) read all about connections. Our posts field accepts a post_typeargument which is a String. We default this to be “post”, so providing it isn’t necessary. This way, we can get a listing of any type of posts we want! Neat!
Lastly, it resolves by calling ConnQueries.getPosts( args ). This should look familiar! Remember I mentioned above that calling getPosts() will return a promised array? Well, the graphql-relay package helps us out by giving us the connectionFromPromisedArray.
Now, we just need to define GraphQLPost and PostsConnection.
Defining Post and PostsConnection
In our data/schema/posts.js file, this is what you’ll find:
import {
 GraphQL,
 GraphQLObjectType,
 GraphQLID,
 GraphQLString,
 GraphQLInt,
 GraphQLNonNull,
 GraphQLList
} from ‘graphql’;

import {
 connectionArgs,
 connectionDefinitions,
 connectionFromPromisedArray,
} from ‘graphql-relay’;

import { ConnQueries } from ‘../db.js’;

import { PostmetaConnection, GraphQPPostmeta, GraphQLMetaType } from ‘./postmeta.js’;

export const GraphQLPost = new GraphQLObjectType({
  name: ‘Post’,
  fields: () => ({
    id: { type: new GraphQLNonNull(GraphQLID) },
    post_title: { type: GraphQLString },
    post_content: { type: GraphQLString },
    post_excerpt: { type: GraphQLString },
    post_status: { type: GraphQLString },
    post_type: { type: GraphQLString },
    post_name: { type: GraphQLString},
    menu_order: { type: GraphQLInt},
    thumbnail: {
      type: GraphQLString,
      resolve(root, args){
        return ConnQueries.getPostThumbnail(root.id);
      }
    },
    post_meta: {
      type: PostmetaConnection,
      args: {
        keys: {
          type: new GraphQLList(GraphQLMetaType)
        },
        …connectionArgs,
      },
      resolve: (root, args ) => {
        return connectionFromPromisedArray( ConnQueries.getPostmeta( root.id, args.keys ), args);
      }
    }
  })
});

export const {
  connectionType: PostsConnection,
  edgeType: GraphQLPostEdge,
} = connectionDefinitions({
  name: ‘Post’,
  nodeType: GraphQLPost
});
Whew, that’s alot! Well, most of it should look somewhat familiar. Skipping past the imports, we get to GraphQLPost which is a custom definedGraphQLObjectType (just like GraphQLUser is!). Again, we name it “Post” and give it a bunch of fields. Notice how these fields looks JUST like the fields we used to define our Post model in db.js. The only additional fields are thumbnail, and post_meta. I’m going to skip over those for this article, because they tackle some more advanced stuff that will be covered in a later article.
Below our GraphQLPost definition is the PostsConnection definition. This is a pretty standard connection definition. This will gives use nodes and edges on our GraphQLPost, which are required for pagination, amongst other things.
If this is confusing, playing around with the queries might make more sense. Luckily, GraphQL gives us a tool for that called GraphiQL.
For your education experiences, I’ve left the GraphiQL IDE availableatwordexpress.io:8080. Here, you can live-query the actual WordExpress WordPress database. Check this out!
The wonderful thing about GraphiQL is that it autocompletes for you. So, if you start with a blank slate you can get to where you want to be quickly. Play around with it!
Next Steps
The WordExpress project has a slightly more complex schema than displayed here. I urge your to clone the repo and play with it yourself. I’m updating documentation on GitHub pretty regularly. If you need help, submit an issue. If you want to contribute, submit a pull request!